sabato 12 novembre 2016

Come creare un ciottolato realistico; How to create a realistic cobblestone

Come creare un ciottolato realistico
Materiali utilizzati e tutorial passo passo

 How to create a realistic cobblestone
Materials used and W.I.P.


I materiali che ho utilizzato sono:
  • Un supporto per l’acciottolato, nel mio caso intendo eseguire un calco da stampa, quindi ho usato un quadrato 10X10 cm di polistirolo ad alta densità spesso 1mm. Sconsiglio i legnami poiché la procedura che andremo ad eseguire richiede molta acqua.
  • Del polistirolo a bassa densità con grana medio grossa.
  • Del DAS.
  • Un pennello a punta piatta, di grandi dimensioni. Più economico è meglio è dato che lo useremo per stendere il DAS.
  • Acqua.
  • Vinavil.

The materials that I have used are:
  • A support for the cobblestones, in my case I want to make a mold, so I used a square 10x10 cm of high-density polystyrene with a thickness of 1mm. Do not recommend the wood because the procedure that we're going to run requires a lot of water.
  • Low-density polystyrene with medium grain.
  • DAS.
  • A flat tip brush, large. Cheaper is better because we use it to spread the DAS.
  • Water.
  • Vinylic glue.

Il procedimento che ho seguito è il seguente:

The procedure I followed is the following:
  1.  Ho preso il blocco di polistirolo a bassa densità e ho iniziato a frantumarlo a mano. Tutto va fatto in maniera dolce in modo da non rompere le palline che costituiranno i nostri ciottoli. Il procedimento è un po’ noioso, ma dopo 30 min dovremmo avere abbastanza ciottoli per la nostra base.                                                                                                                                       I took the low-density polystyrene block and started to shatter it by hand. Everything must be done in a gentle way so as not to break the balls that will constitute our pebbles. The process is a bit 'boring, but after 30 minutes we should have enough pebbles for our base.
     
  2. Spargete una dose abbondante di vinavil puro sulla base, aiutandovi con una spatola o col pennello. Mi raccomando abbondate, i ciottoli dovranno affondare per qualche decimo di millimetro nella colla.                                                                                                                Sprinkle a generous amount of pure PVA glue on the base, using a spatula or with a brush. I recommend abound, the pebbles will sink for a few tenths of a millimeter in the glue.
  3. Spargete i ciottoli di polistirolo sulla colla, una volta cosparsala superficie capovolgetela per verificare che non vi siano buchi. Nel caso ci fossero inserite dei ciottoli a misura negli spazi.                                                                                                                                             Spread the pebbles on Styrofoam glue, once cosparsala up on its side surface to check that there are no holes. If there were inserted to fit into the spaces of pebbles.
  4. Ribaltate la mattonella su un piano ed esercitate pressione per far aderire meglio i ciottoli, dopodiché lasciate in pace il tutto fino ad asciugatura completata.                                       Overturned the tile on a floor and apply pressure to adhere better to the pebbles, then left alone together until complete drying.
  5. Una volta che il vinavil è asciutto possiamo riempire gli spazi fra i ciottoli. Spalmate del DAS su una paletta, appiattitelo in modo che sia alto circa 1mm e spargete molta acqua su di esso. Col pennello iniziate a grattare il DAS, disfacendolo e mescolandolo all’acqua.                   Once the PVA glue is dry we can fill in the spaces between the pebbles. Spread of the DAS on a palette, flatten it so that it is about 1mm high and spread a lot of water on it. With the brush start to scratch the DAS, wasting away and mixing it with water.
  6. Raccogliete col pennello la papocchia appena creata e spargetela sui ciottoli, in maniera che scorra fra gli spazi, turandoli. Qualora ci fossero spazi molto ampi potete usare del DAS meno diluito per riempirli e successivamente affondarci sopra dei ciottoli che sono avanzati dal passo 3.                                                                                                                                              Gather the dough you just created  with the brush and spread it on the pebbles, so that it flows between the spaces, closing them. If there are very large areas can use the DAS less diluted to fill and then sink us over the pebbles that are advanced from step 3.
  7. Pulite il pennello nell’acqua, scolandolo leggermente in maniera che rimanga umido. Iniziate a passarlo leggermente sui ciottoli per pulirli dall’eccesso di DAS. Il DAS dovrebbe lasciar vedere solo il 10-20% del volume del ciottolo.                                                                         Clean the brush in water, slightly draining so it stays moist. Started to pass it lightly on the cobblestones to clean the excess of DAS. The DAS should let see only 10-20% of the Pebble volume.
  8. Lasciate asciugare il tutto. Ripetete il passo 7 se necessario.                                                         Let everything dry. Repeat Step 7 if necessary.
  9. Verificate che la superficie non sia imbarcata, se così fosse agite applicando forza sulle diagonali e le mediane per farla tornare piana.                                                                      Review the surface is not bent, if it did act by applying force on the diagonals and medians to flatten it.
  10. Nel caso il ciottolato sia troppo irregolare potete scartavetrare prima con una cartavetro media e poi con una fine per rendere il tutto più pianeggiante. Appoggiate la cartavetro a un piano e passate ripetutamente il ciottolato cercando di variare le direzioni della passata.                          If the cobblestones is too uneven you can use a medium sandpaper and then a finer to make it more level. Position the sandpaper to a plan and pass over it the cobblestone repeatedly looking to change directions of the pass.
    Realistic cobblestone in 28mm
  11. Applicate una mano protettiva di vinavil diluito al 50% con acqua. In tal maniera nessun ciottolo dovrebbe saltare e il DAS rimarrà in posizione.                                                           Apply a protective coat of PVA glue diluted 50% with water. In this manner no pebble should jump out and the DAS will remain in place.

mercoledì 9 novembre 2016

Un po' di Haradri; Some Haradrims

Un po' di Haradrim

Some Haradrims

 
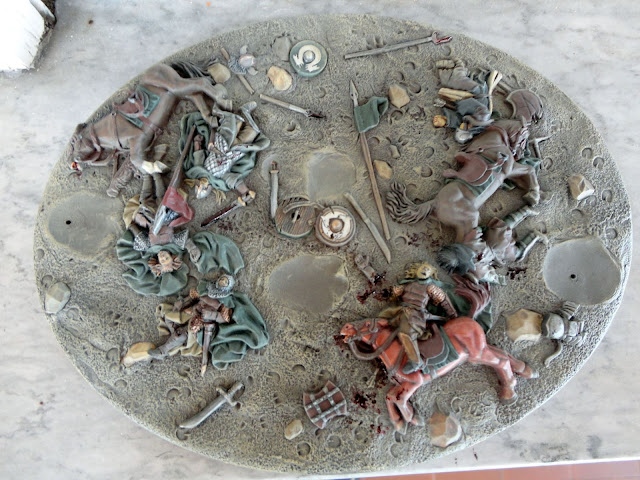
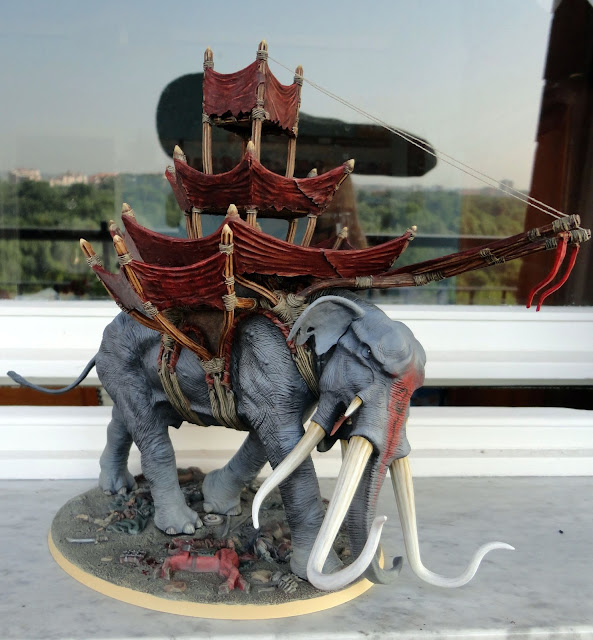
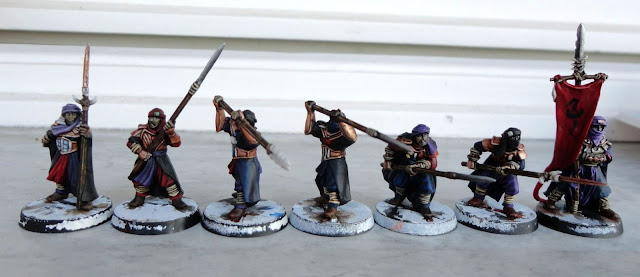
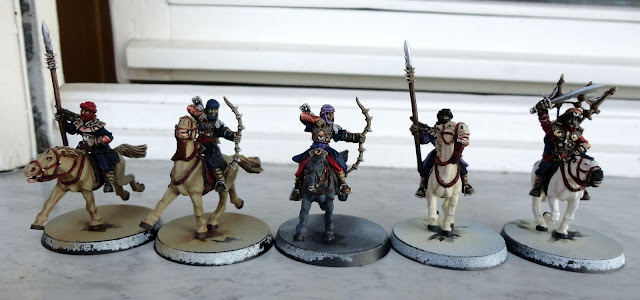
Tempo fa ricevetti una commissione di pittura, 12 guerrieri Haradrim, 5 Cavalieri, gruppo di comando e alcuni personaggi più un Mûmak o Olifante. Ecco le foto del risultato, le miniature non hanno la basetta su richiesta del committente.

Some time ago I received a painting commission, 12 Haradrim warriors, 5 knights, a command group some characters plus a Mûmak . Here are the photos of the result, the miniatures are not based at the request of the buyer.


Mumak base

Harad war Mumak

Haradrim Warriors


Haradrim knights


lunedì 31 ottobre 2016

Miniature Claymore castings (Guerra dei cent'anni); Claymore castings miniatures (Hundred Years War)

Miniature Claymore castings (Guerra dei cent'anni)

Claymore castings miniatures (Hundred Years War)


Due settimane fa ho acquistato delle miniature Claymore castings, la ditta è giovane ma il loro range si sta espandendo velocemente. Essendo interessato al primo periodo della Guerra dei cent'anni ho subito acquistato alcune loro miniature.
Ero preoccupato relativamente alla compatibilità con le altre miniature che posseggo (Foundry, Fireforge e Perry in plastica) ma sono rimasto piacevolmente sorpreso.
Le miniature sono perfettamente compatibili, inoltre il metallo di cui sono realizzate è di ottima qualità molto duro e difficile da deformare; quindi è estremamente improbabile che si deformino quando le si manipola o peggio quando cadono. Unica pecca le mani dei lancieri devono essere bucate, cosa molto difficile da fare con un trapano a mano.
Avrei preferito la plastica ma per una ditta così piccola è impossibile avere la tecnologia necessaria.

Two weeks ago I bought some miniatures from Claymore castings, the company is young but their range is expanding rapidly. Being interested in the first period of the Hundred Years War I immediately bought some of their miniatures.
I was concerned regarding the compatibility with other miniatures that possess (Foundry, Fireforge and Perry plastic) but was pleasantly surprised.
The miniatures are perfectly compatible, also the metal of which they are made is of excellent quality very hard and difficult to be deformed; so it is extremely unlikely to deform when handling or worse when they fall. The only flaw are the hands of the spearmen that must be drilled, very difficult thing to do with a hand drill.
I would have preferred plastic but for such a small company is impossible to have the necessary technology.

Il dettaglio è fenomenale, persino il retro degli scudi è dettagliato, l'accuratezza storica non è da meno.
Ogni miniatura ha armi secondarie, vi sono molti falcioni estremamente comuni nel periodo, un uomo d'arme ha una goedendang o plancon (foto 5&6), è la prima volta che vedo quest'arma su di una miniatura. Le armature sono cotte di piastre, di maglia e gambeson o un mix di queste.
Le miniature che portano lo scudo hanno le cinghie che fisicamente dovrebbero reggerlo al braccio o alle spalle, nessun dettaglio è stato tralasciato!

Detail is phenomenal, even the back of the shields is detailed, historical accuracy is not far behind.
Each miniature has secondary weapons, there are many falchions extremely common in the period, a man-at-arms has a goedendang or Plancon (5 & 6 photos), it is the first time I see this weapon on a miniature. The armor plates are cooked, mesh and gambeson or a mix of these.
Miniatures that lead shield have the straps that should hold it physically to the arm or shoulder, no detail has been left out!

Con tutti questi dettagli sarebbe un peccato se lo stampo fosse di cattiva qualità. Niente paura, le miniature sono perfette oserei dire, anni luce a quanto sono abituato.
Solo alcune necessitano di lima e cartavetro e comunque per modeste rimozioni di materiale. Niente bave o scalini, se non siete dei perfezionisti potete dipingerle appena spacchettate.

With all these details would be a shame if the mold was of poor quality. No fear, the miniatures are perfect dare I say, light years I am used to.
Only a few require rasp and sandpaper, and in any case for modest removals of material. No smudges or steps, if you are a perfectionist, you can paint them just unpacked.

Ultimo punto, le pose:
Le pose sono varie, classiche in posizione di attesa o in corsa, ma anche alcune estremamente dinamiche e "fighe". Nessuna posa appare strana o stupida.

Last point, the poses:
The poses are varied, classic in waiting position or in the race, but also some extremely dynamic and COOL. No posture appears strange or stupid.

Ecco un po' di immagini, i pacchetti che ho acquistato contengono 4 miniature ciascuno, le miniature rappresentano dei lanceri/pavesari (OT 45) e degli uomini d'arme (OT 46, 47 e 48) .

Here is a bit 'image, each package that I have bought contains 4 miniatures, thumbnails representing the spearmen/pavesari (OT 45) and men-at-arms (OT 46, 47 and 48).

Volendo dare un punteggio a ciascuna caratteristica su una scala da 1 a 5:

Wishing to give a score to each feature on a 1 to 5 scale:

Accuratezza storica (historical accuracy): 5
Compatibilità (compatibility with other miniatures): 5 con le marche elencate.
Dettaglio (detail): 5
Materiale (materials): 4
Pose (poses): 5
Prezzo (price): 3 unica nota dolente, 7 sterline a blister ma ne vale la pena.
Qualità dello stampo (quality of the mould): 5

Consiglio l'acquisto delle miniature Claymore castings, anche solo per dipingerne alcune da tenere in vetrina; sono una spanna sopra alle solite miniature da wargame.

I suggest buying Claymore castings miniatures , just to paint some to keep in the showcase; they are a cut above the usual wargames miniatures.

Claymore castings size comparision perry minitures and fireforge pavisers


Claymore castings size comparision Perry minitures e fireforge men at arms


Presto dovrebbero uscire pure i cavalieri, non vedo l'ora!

Soon should come out the Knights, I can not wait!

mercoledì 14 settembre 2016

Shermans per Bolt Action in 15mm (Operazione Cobra) PARTE 2; Shermans for Bolt Action in 15mm (Operazion Cobra) PART 2

Colori di base utilizzati e tecnica di modulazione

Basic colors used and modulation tecnique


I colori che ho utilizzato per il primo Sherman, e che userò anche per gli altri sono di due ditte: Tamiya e Vallejo. I Tamiya sono stati diluiti con il loro diluente specifico, mentre i Vallejo con l'alcol bianco per pavimenti. Quest'ultimo, contenendo fino al 30% di alcol isopropilico, è un diluente poco aggressivo, ottimo per gli acrilici.

The colors I used for the first Sherman, and that I will use for the others are from two companies: Tamiya and Vallejo. The Tamiya were diluted with their specific thinner, while Vallejo with white alcohol for floors. The latter, containing up to 30% of isopropyl alcohol, is a little aggressive diluent, great for acrylics.

Tamiya:
XF-62 Olive drab
XF-69 NATO black
Vallejo:
72067 Cayman green (Game color)
70915 Deep yellow (Model color)
70950 Black (Model color)


Il procedimento che ho seguito durante la pittura ad aerografo è il seguente.

The procedure that I followed during the airbrush painting is the following.

1)  Innanzitutto, dopo aver primerato di grigio il modello, ho dato diverse mani leggere di Olive drab diluito al 50% in volume col X-20A, quando ho visto che la copertura era omogenea ho insistito sulle aree più basse di scafo, sovrastruttura e torretta del carro; in modo che si creasse una sfumatura scura iniziale diretta verso il basso.

First, after primering grey model, I gave several light coats of Olive drab diluted 50% by volume with the X-20A, when I saw that the coverage was homogeneous I insisted on the lower areas of the hull, superstructure and turret of the tank; so that it would create a direct initial dark shade down.


2)  Successivamente ho aspettato circa 12 ore, poi ho iniziato con la passata di Cayman green; questo è stato diluito al 60% in volume con l'alcol bianco.  La diluizione in questo e nei passaggi seguenti è molto importante, il pigmento deve essere molto diluito in modo che una volta seccato non risulti coprente ma lasci intravedere il colore sottostante e crei una fusione gradevole e non uno stacco brusco. Il principio è lo stesso delle velature date a pennello, ma è molto più veloce da eseguire.

After that I waited about 12 hours, then I started with a passage of Cayman green; this was diluted to 60% by volume with the white alcohol. The dilution in this and the following steps is very important, the pigment must be very diluted so that once dried do not result as a topcoat but let glimpse the underlying color and create a pleasant fusion and not a sharp contrast. The principle is the same of the glazes with a brush, but it is much faster to execute.

Vi allego alcuni suggerimenti frutto della mia esperienza con l'aerografo:

I am attaching some suggestions fruit of my experience with the airbrush:


Mi raccomando diluite sempre in maniera adeguata i colori, soprattutto quando usate l'aerografo; la maggior parte dei problemi si creano proprio per un'errata diluizione. Colori troppo densi e l'aerografo continuerà a bloccarsi o addirittura non inizierà neanche a spruzzare, troppo liquidi e non avrete il tempo di spruzzare, che già il modello gronderà di colore che gocciolerà ovunque prima di asciugare; macchiando la superficie.

I always recommend to thin down colors adequately, especially when using an airbrush; most of the problems are created just to incorrect dilution. Too dense colors and airbrush continue to jam or even not even begin to spray, too liquid and will not have time to spray, which already the model drips of color that will drizzle everywhere before drying; staining the surface.

Non aerografate in giornate umide, buie e fredde se non disponete di un ambiente controllato e indipendente dall'esterno. Per dire, io dipingo in veranda, non è un esempio di ambiente controllato e indipendente da quello esterno.

Don't airbrush in humid, dark and cold days if you do not have a controlled environment independent from the outside. To say, I paint on the porch, this is not an example of environment controlled and independent from the external.

+ Per diluire i colori acrilici non usate MAI l'acqua, cercate sempre di usare alcol o un liquido con un calore latente di evaporazione molto più basso di quello dell'acqua. Il calore latente indica l'energia  (calore) che deve essere assorbito dal liquido per evaporare, più è alto più il liquido ha difficoltà a vaporizzare e quindi ad asciugarsi.

To dilute acrylics NEVER use the water, always try to use alcohol or a liquid with a latent heat of evaporation much lower than that of water. The latent heat indicates the energy (heat) that must be absorbed by the liquid to evaporate, the higher the more the liquid has difficulty to vaporize, and then to dry.

+ Se volete vivere a lungo usate una mascherina per non inalare schifezze, cercate di avere aria di ricambio. Proteggete la mano con cui tenete il modello o il suo supporto con un guanto, il sudore lascia segni indelebili sulla pittura appena seccata; inoltre eviterete di avere le mani verdi dopo la prima passata.

If you want to live long use a mask to prevent breathing crap, try to have replacement air. Protect the hands with which you hold the model or its stand with a glove , the sweat leaves indelible marks on the painting soon dried; also you avoid to have green hands after the first pass.


Tornando al procedimento, ho spruzzato il Cayman green nei punti più in luce del modello, aiutandomi con dei pezzi di cartone a creare delle maschere con cui coprire le parti che volevo rimanessero scure. In questo modo si vengono a creare delle zone di contrasto che danno tridimensionalità al colore altrimenti piatto.

Returning to the procedure, I sprayed the Cayman green on more light points, helping me with pieces of cardboard to create masks with which to cover the parts that I wanted to remain dark. In this way we are created the areas of contrast that give three dimensionality to the otherwise flat color.


3)  Terminata la seconda mano aspettate un'altra mezza giornata. Poi mettete nell'aerografo un mix di 10% Deep Yellow, 30% Cayman green e 60% di alcol bianco e, sempre usando le maschere e aggiustando la posizione del modello, iniziate la terza mano. Questa volta la mano dovrà essere più sottile della precedente e dovrà essere data solo sul tetto della torre e dello scafo, eventualmente su qualche bordo acuminato o punto che volete risaltare. Quando avete finito, prima di riporre i colori, usando lo stesso mix col pennello; evidenziate i particolari troppo piccoli da fare a spruzzo. Eventualmente aggiungete altro giallo in piccole dosi per aggiungere contrasto.

After the second coat wait another half day. Then place in the airbrush a mix of Deep Yellow 10%, Cayman green 30% and  White alcool 60%  and ,always using masks and by adjusting the position of the model, started the third coat. This time the passage has to be thinner than the previous one and will be given only on the roof of the turret and the hull, possibly on some sharp edge or point that You want to emphasize. When you finished, before putting away the colors, using the same mix with the brush; highlight the details too small to do by spraying. Possibly add more yellow in small amounts to add contrast.


4)  Per la mimetica aspettate nuovamente che il colore secchi adeguatamente,  mascherate il mezzo con il patafix lasciando delle chiazze non coperte, queste diventeranno la nostra mimetica. Abbiate premura che il patatfix crei dei bordi definiti e tondeggianti. Per tirare bene il patafix aiutatevi con uno stuzzicadenti o un pennello girato al contrario.
Caricate l'aerografo con il Black diluito al 60% in volume con l'alcol bianco e spruzzate la mistura nei punti non coperti dal patafix, facendo attenzione a definire bene i bordi delle chiazze mimetiche.

For the mimetic wait again that the color properly dried, masked the vehicle by patafix leaving patches of uncovered that will become our camouflage. Strive to the patatfix creates defined and rounded edges. To pull well patafix help yourself with a toothpick or brush turned upside down. Loaded the airbrus with the Black diluted to 60% by volume with the white alcohol spray the mixture on the points not covered by patafix, making sure to define the edges of the camouflage Patches.

No images for now

5)  Come al solito aspettate l'asciugatura, non rimuovete il patafix. A colore secco ricaricate l'aerografo con questo mix Black 30%, NATO black 10% e 60% in volume alcol bianco. Usate questo colore più chiaro per mettere in risalto angoli e punti in luce della mimetica. Una volta terminato questo passaggio con il pennello passate sui particolari minuti, esattamente come avevate fatto per il verde. Potete aggiungere un pochino di Nato black per far risaltare ancora di più i particolari a patto che la mistura non diventi troppo grigia.

As usual wait for it to dry, do not remove the patafix. As the color dried reload the airbrush with this mix Black 30%, NATO black 10% and 60% by volume of White alcohol . Use this lighter color to highlight corners and points in light. Once this step with the brush passed on minute details, exactly as you did for the green. You can add a little of NATO black to stand out even more details as long as the mixture does not become too grey.

No images for now

FINITO, i colori basici sono stati dati e avete ottenuto una modulazione decente su tutto il mezzo, il prossimo passaggio sarà l'invecchiamento usando colori ad olio, acrilici e pigmenti.

FINISHED, the basic colors have been given and you have got a decent modulation on whole vehicle, the next step will be the wheathering using oil paints, acrylics and pigments.

domenica 11 settembre 2016

Bolt Action in 15mm

Shermans per Bolt Action in 15mm (Operazione Cobra)

Shermans for Bolt Action in 15mm (Operazion Cobra)


Inizio questo blog presentandovi questo lavoro, attualmente sto restaurando le mie miniature di FoW per giocarci a Bolt Action. Eccovi una carrellata di Sherman in 15mm della Battlefront, ovviamente in B.A. non li userò mai tutti, ma con l'aerografo farne uno o 10 è uguale, quindi restaurerò l'intera compagnia I.

I start the blog presentig this work, currently i'm restoring my FoW miniatures for playing Bolt Action. Here's a roundup of Shermans in 15mm from Battlefront, of course in B.A, i will never use them all, but with the airbrush make one or 10 is the same, so will restore the entire company I.


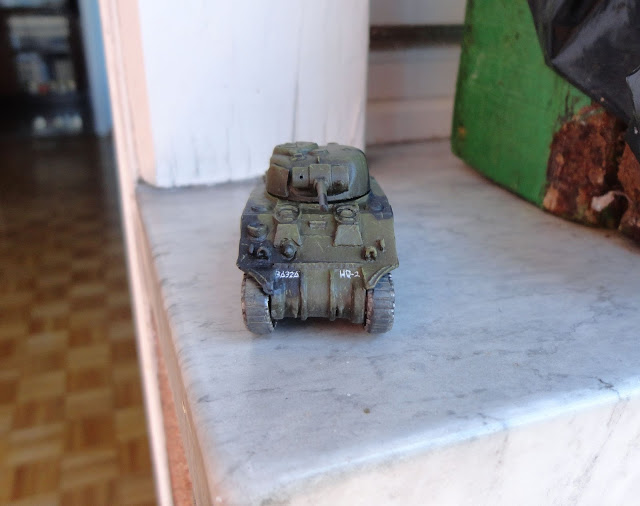
Ecco il comando di compagnia senza sporco.
Here's company command without wheatering.

Sherman 15mm FoW Bolt action Normandy

Sherman 15mm FoW Bolt action normandy
 
M4 Sherman 15mm


E con lo sporco, queste foto son venute un po' scure.
And with weathering, thus pics are a bit dark.
 
M4 Sherman 15mm FoW Bolt action normandy


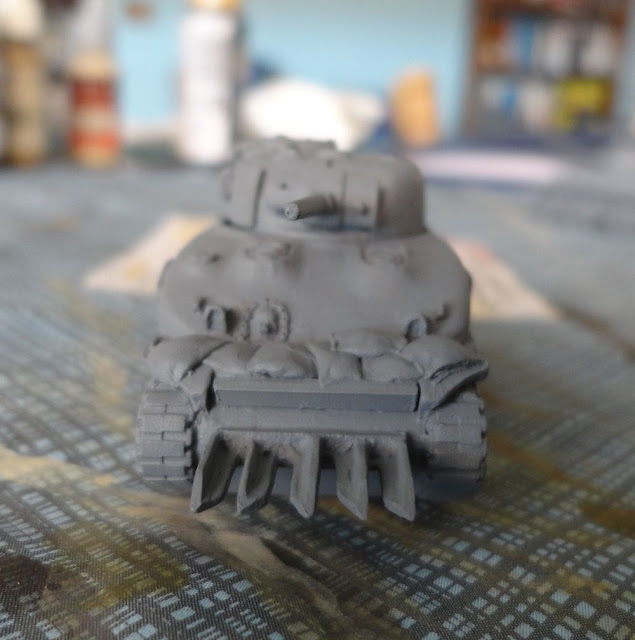
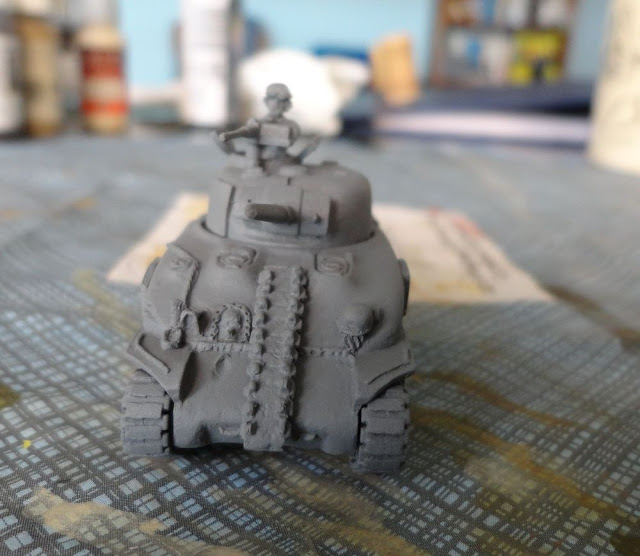
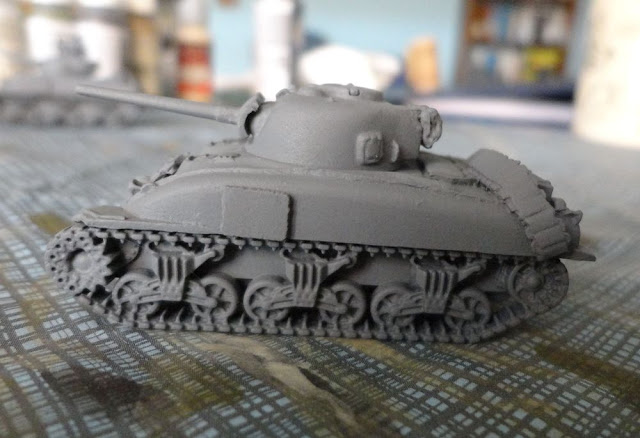
Vi anticipo il primo plotone per ora primerato di grigio.
I anticipate the first platoon for now primered in grey.
 
M4A1 Sherman FoW 15mm


Sherman 15mm FoW Bolt action normandy


Sherman 15mm FoW Bolt action normandy


Sherman 15mm  FoW Bolt action
 
Ciascuno sherman è stato personalizzato con l'aggiunta delle piastre da 1" di blindatura aggiuntiva, mercanzia varia, danni da battaglia e il mitragliere della 50. di cui vado molto fiero perché ci ho smadonnato parecchio.

Each sherman was customized with plates 1"of  armor plating, stowage, battle damages and the gunner for 50. HMG. I'm very proud because i have swore a lot.